
Random Number Wheel
Let chance pick any numberAdd numbers to the wheel
Current numbers in the wheel
⚙ Other settings - click to open
Premade palettes
Here you can find all the premade color palettes. Just click on any of the palettes, and the colors will immediately change on the wheel.
You will find the original color settings when the page loads in the Basic Colors palette.
Below each palette, you will also find a button to transfer the colors of that palette to a custom palette. You can also find the custom colors of the wheel in the menu of this setting. You can edit, add, or remove colors as you like.
Custom wheel color settings
Custom wheel speed setting
Wheel spin time (in seconds)
Here you control how long the wheel will spin after you spin it. You can also enter a decimal point to refine the speed.
0 means immediate display of the result without any animation.
Idle spin speed
Here you can adjust the speed of the slow idle spinning of the wheel. Slide the slider all the way to the left for a complete stop.
Custom font size settings in the wheel
Here you can set your own font size and color in the wheel. This can come in handy for some palettes where the default "white" is not quite appropriate. For more or fewer items in a wheel, it may then be useful to increase or decrease the font size
Usually when the page loads, the font size is set to 16 and the color is white, but different wheels may have different initial settings. (So typically you can set "white" as the color without the quotes, or clear the color field).
The font size is calculated automatically when any other change is made to the wheel, so typically adding/removing items, changing colors, etc... Here you can set the font size to stop being calculated automatically, but you can set it yourself.
Font size in px
Custom font color settings in the wheel
CSS color format
or you can choose from the palette:
Custom wheel centre size adjustment
Here you can adjust the size of the wheel center, both the size and color of the wheel, as well as the outline. By default, the size is set to 30 and the color is "white", for the outline it is set to "black" and 1
Centre wheel size
CSS color format
or you can choose from the palette:
Centre wheel contour width
CSS color format
Save settings or import/export from file
Clicking the button will save the current settings to your browser. Even after refreshing the page, you should still see any items, colors, or anything else you have set. Note that this setting applies to this wheel and this wheel only. If you go to another page with another wheel, this setting will not carry over.
This button will clear the browser settings for the wheel on this page. After deleting the settings, refresh this page in the browser and the wheel will load with the basic settings, i.e. without any modifications. Deleting the settings only applies to this wheel. Deleting settings from this wheel will not delete settings from any other pages or wheels.
Here you can save your current wheel settings to a file. This is useful for transferring to another device or purely as a backup.
Here you can upload the settings using the file you created above:
📝Table of contents
Create a wheel of numbers and let chance decide
Create a random number generator and let chance decide which one you select.
If you need to choose from random numbers, this is the wheel for you.
This wheel is pre-made to make entering numbers as easy as possible so you can add everything in bulk or one at a time.
How to use the Wheel of numbers
You really only need to spin this wheel, but you may want to adjust the numbers to suit yourself. Spin by clicking on the button on the wheel, (or use the shortcut Ctrl + Enter, or ⌘ + Enter), and wait for the result of the spin. You can also use the Ctrl + Enter or ⌘ + Enter shortcut to stop the wheel immediately and see the result.
The wheel spins completely randomly and is really very easy to use.
First, let’s look at the basic setup that is required to use the wheel. Then we’ll go over the other settings that tend to modify the look or other features of the wheel, like font size, colors, spin speed, but also how to save your settings so you always have it handy.
Basic settings for normal use
How to add numbers to the wheel and spin for a random result
This is really the only required setting, everything else is completely optional and only if you want to customize the wheel.
First you need to put the numbers you want to generate random results from into the wheel. You do this in the tab, which can be found to the right of the wheel or below it, depending on the size of your screen:
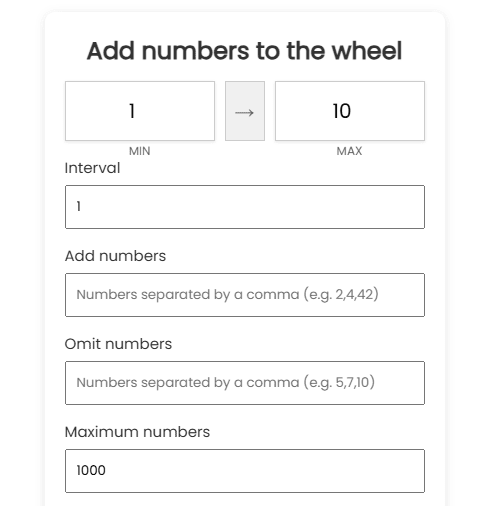
At the top you see the option to add numbers FROM TO. Here you enter the range of numbers that will be automatically inserted into the wheel.
Then in the interval field, enter the difference between each successive number (or how much larger each successive number will be). For example, if you select MIN 1, MAX 9 and Interval 2, the numbers 1, 3, 5, 7 and 9 will be in the wheel. Interval 1 means that the numbers will go in sequence.
The Add Numbers field allows you to add more individual numbers. Separate them with a comma and they will automatically be added to the wheel. Similarly, you can remove individual numbers from the wheel. Enter them in the same way, i.e. separated by a comma.
The omitted numbers have priority over the added numbers, so if you enter the same number into both fields, that number will not be present in the wheel.
In the Maximum numbers field you can specify the maximum number of numbers that will appear in the number generator. It’s not that important, but if you accidentally type a huge number into the number range, it could slow down your device quite dramatically. The preset 1000 entries will probably be enough for normal purposes, but you can change this number if you need to.
Well, that’s pretty much it. Once you’ve inserted the items, just click the button below the wheel and wait for a random result!
If you want to stop the wheel earlier, you can use “STOP” button, which will stop the wheel and evaluate the result immediately. So if you want to pick the result yourself, even if not randomly, this is a cool option.
Delete or move items in the wheel
If you have added any numbers you don’t want in the wheel, use the box immediately below the add box:
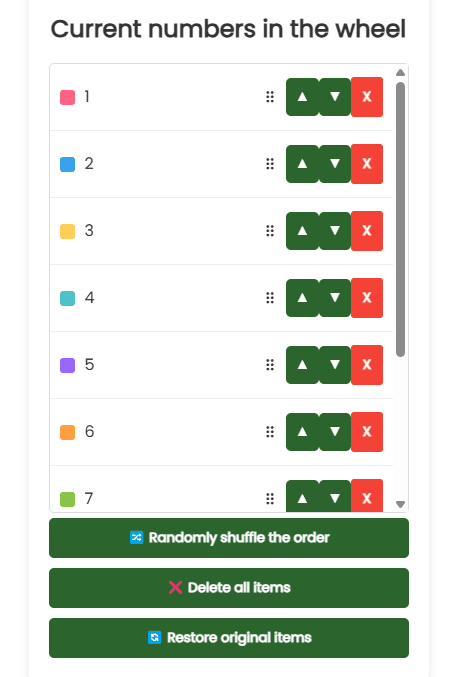
In this field you will find all currently added items in the wheel of fortune. On the right you will find the control buttons. A red X will delete the item. The up and down arrows replace them with the items above/below.
You can also drag and drop to change the order. That is, grab an item with the left mouse button and move it anywhere in the array of items. It works the same way on touch screens, where you first hold long on an item and then drag it with your finger.
This can come in handy if you want to change the order or perhaps the colors.
Below the field, you will find buttons to shuffle the order, clear everything, or restore the original data in the wheel, so the wheel will be restored to the original state as when the page was first loaded.
Other settings to change the colors and other properties of the wheel
These settings aren’t that important, but you can easily use them to customize your wheel. These include font size, color palette, spin time, and other little things.
You’ll find the settings by screen size directly below the wheel, and on smaller screens below the elements box.

Click to open the settings.
Depending on the screen size, you will find the main settings sections on the left or at the top.
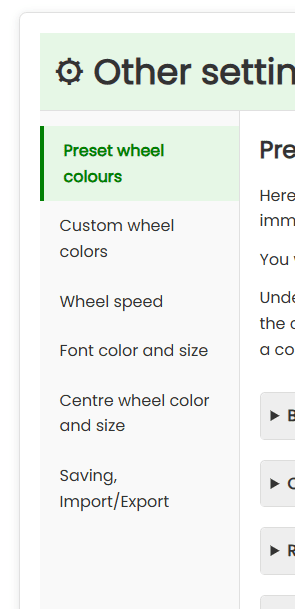
Click on a section to open it and then you can modify everything on the wheel in real time.
Change the color of the wheel – preset and custom palettes
In the preset wheels section, you can choose different palettes depending on the theme. If you would like to add a preset, feel free to get in touch, we will add the palette without any problems 😊
If you want to select a palette directly on the wheel, just click on it and the colors on the wheel will update immediately.
In the second section, you have the option to create your own color palettes. You can either create your own palette from scratch or edit a pre-made one.
You can insert a pre-made palette into your own palettes by clicking the button below the palette:
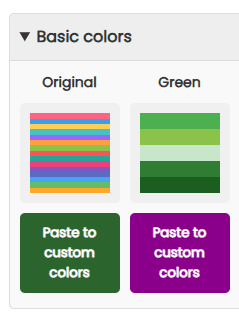
The button with the last inserted palette will remain purple to keep you in the loop.
Then go to the Custom Wheel Colors section, which will also be marked with a red dot to let you know to search here. The selected palette will be copied right here where you can edit it to your liking.
Just click on the palette to select your own palette and apply the colors to the wheel. Depending on the size of your screen, you will find it pinned to the left or at the bottom of the custom palette section.
In this section, you need to insert the colors in a format that the browser will understand, i.e. the kind of format you would insert as CSS. Don’t worry, it’s not a big deal.
Basically, you have the option to insert pre-made color names (you can find them under the link above), hex code, or RGB.
You can also easily select a color from the picker below the field:
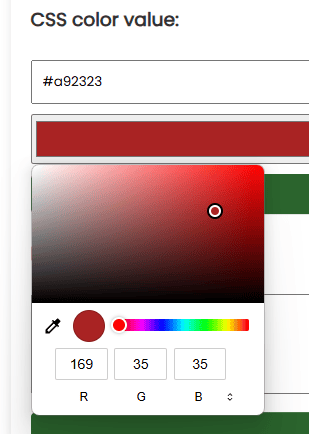
Simply click on the picker and choose your color. This is a built-in feature of your browser, so it may look a little different depending on your device.
Similar to inserting items into the wheel, you can also bulk insert colors, meaning one color per row.
You can then find all the inserted colors below, which you can edit in exactly the same way as for the item box, i.e., delete colors or change their order by clicking or dragging the mouse.
Wheel spin time and slow spin speed
In the next section of the menu, you can set how long the wheel will spin after you spin it. If you set it to 0, the wheel won’t even spin and will just show a random result.
Just enter the number of seconds in the box, which then corresponds to the time between pressing the button to spin the wheel and the result being displayed. You can also add a decimal point.
If you want to change the function of the wheel a bit and select the results yourself, you can set, for example, 300 seconds and then stop the wheel with the stop button, which also evaluates the result immediately.
Further down you’ll find a slider for a slow spinning wheel that will start when you make adjustments to the wheel or even when the page loads. This is just a little extra feature that doesn’t really change the operation at all, but just keeps the wheel from stopping completely 😊
If you want to stop the slow spin, just slide the slider all the way to the left. You can accelerate it by sliding it to the right.
Color and font size in the wheel
The size of the font in the wheel is calculated automatically according to the number of items inserted. So in theory, you don’t need to do anything and the font size should match (the font has some fixed minimum, so if you insert a thousand items, the font probably won’t be ideal, but for most uses, the automatic calculation is sufficient).
Changing the font size
If you want to change the font size to your own, you can do it in this section:
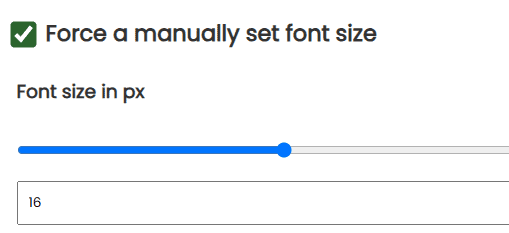
First, you need to click the button that says you want to force the font size. If you click it, it will automatically resize in real time according to your settings. You can find this a little further down where you can move the slider or set the size in pixels.
If you want to start the automatic calculation again, just click the button and the wheel will revert to the previous font size.
Change the font color
In this section, you can also change the font color. The font color changes automatically to black or white depending on the contrast of the background, which can be seen clearly in the picture with a large range of colors on the wheel:

Without this feature, the different palettes would look rather ugly, and some fonts would simply be unreadable.
However, you can also change the font color yourself if it doesn’t suit you, to any color you like.
First, you need to click the button to force your own font color:
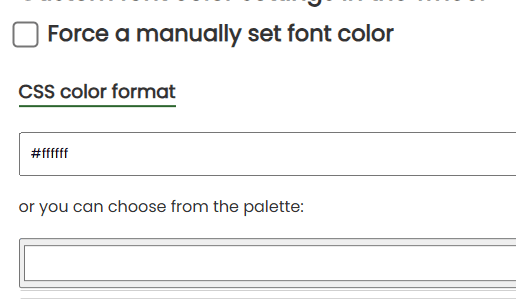
Just below, set the font color again via CSS color format or from the picker. The font color is instantly adjusted directly on the wheel.
Adjusting the color and size of the center wheel
The center wheel is essentially a pure design element and has no effect on the function of the wheel. However, you still have the option of adjusting its color, size or width, and the color of its outline to really make the wheel your own.
In the settings, just move the sliders to make the wheel and outline bigger/smaller, and as in the other settings, select the color.
Save to browser and import/export
In the settings, you will also find the option to save the current settings and items in the wheel, which will then be loaded when the page is reloaded.
How to save wheel settings to your browser
Click the save button and the settings are saved directly to your browser, so you don’t upload them anywhere and we don’t have access to them.
When you reload the page, the settings will remain and you can continue. This is handy when you customize the wheel and the items in it directly to your liking and don’t want to set it up again.
Note that the settings are only saved for the wheel on the page you are on. Because there are different settings for different types of wheels and different ways of adding items, you cannot transfer these settings to another wheel.
How to delete wheel settings
The next button, on the other hand, deletes the save from your browser. To return the wheel to its original state, just reload the page.
Deleting the settings only applies to that wheel. Deleting the settings of a given wheel will not delete any other settings from other wheels.
Importing and exporting settings
If you want to transfer items and wheel settings to another device or browser, or if you want to have several different presets without having to set and copy everything all the time, you can use the import and export function.
First, export the settings, which will be downloaded to a file. Save this file somewhere.
To import/transfer to another device/browser, then select this file a bit further down by clicking the button and import the settings.
Note that this import will only rebuild the wheel according to the settings in the file, but will not save it in any other way. If you wish to save these settings to the browser, you still need to save the setting using the save to browser button.